> ## Documentation Index
> Fetch the complete documentation index at: https://doc.withedge.co/llms.txt
> Use this file to discover all available pages before exploring further.
# Onboarding
> Get started with Edge—your all-in-one API Banking platform. Follow these steps to quickly set up your account and start integrating financial services into your business.
# Getting Started with Edge
Welcome to Edge, your gateway to API Banking. Our platform is designed to seamlessly integrate financial services into your business, helping you deliver better experiences to your users. This guide will walk you through the onboarding process, so you can get started quickly and efficiently.
The Edge onboarding process involves account creation, filling out the registration form, agreeing to terms, account activation, and setting up your password. Follow the steps below to get started.
***
## Onboarding Process
To begin, you'll need to create an Edge account.
[](https://dev.withedge.co/auth/register)
This will take you to the Edge registration page where you can enter your details. Please ensure all information is accurate to avoid any delays.
Once on the registration page, fill out the required fields:
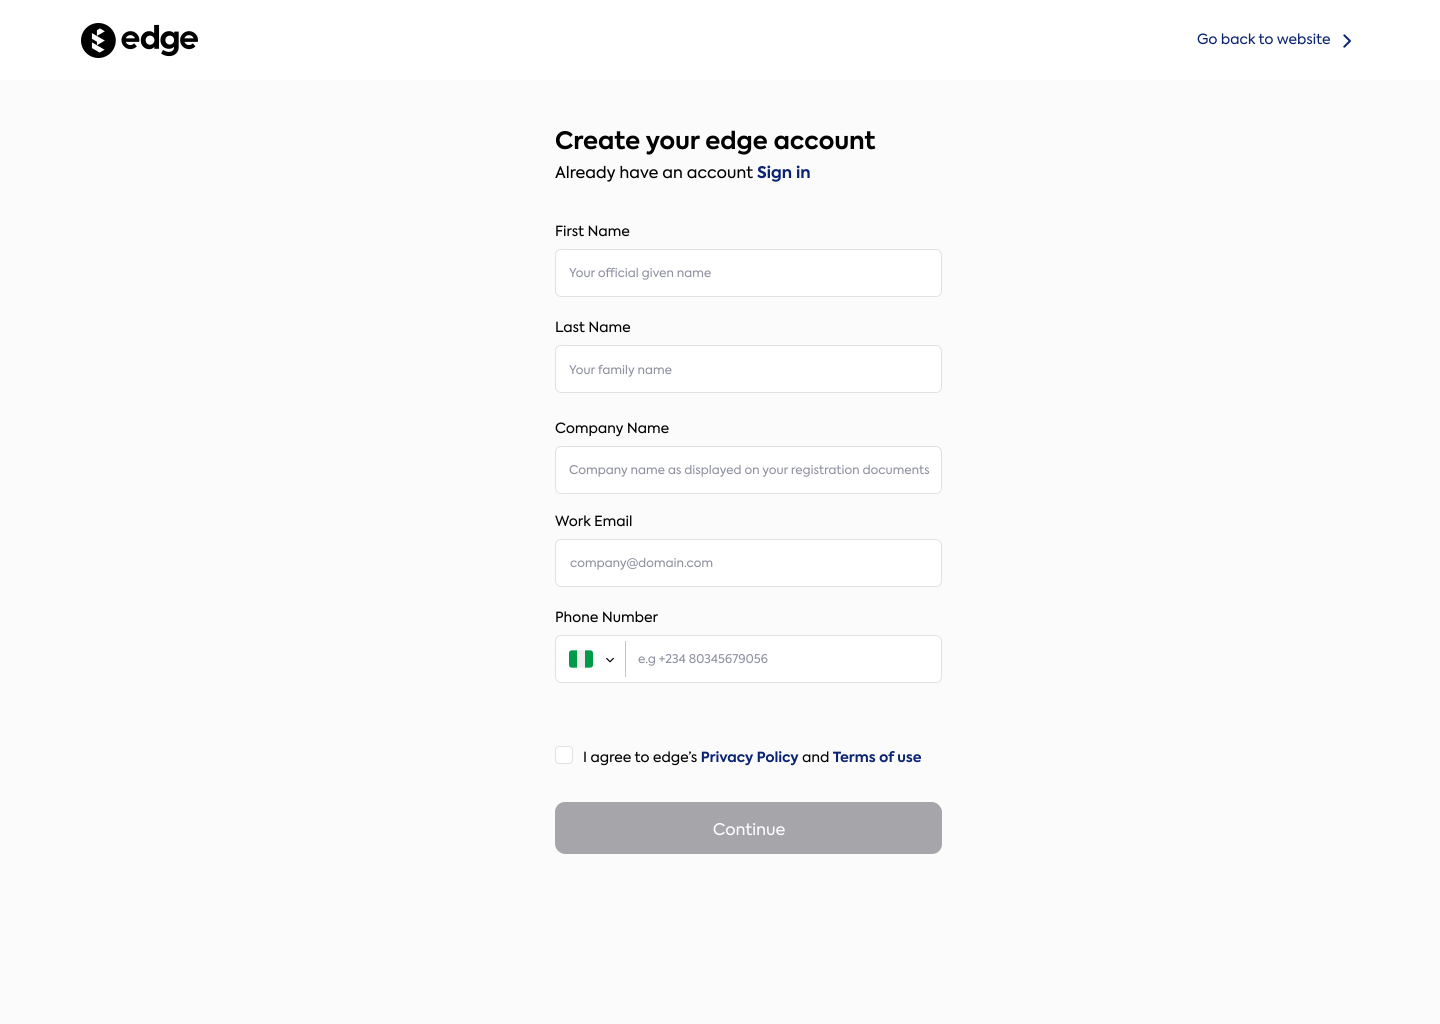
Use alphabetic characters only, with an optional hyphen for double-barrelled names (e.g., "John-Paul").
This should include only letters and spaces (e.g., "Sterling Bank").
Enter a valid email address that you can easily access for future communications.
**Select Your Country:** Begin by selecting the country where your phone number is issued from the dropdown list.\
**Enter Your Local Number:** After selecting the country, type in your local phone number without the initial "0."
Example: If you select Nigeria and your local number is `080234567891`, enter it as `80234567891`.
Review our [Privacy Policy](https://new.withedge.co/privacy-policy) and [Terms of Use](https://new.withedge.co/terms-of-service) carefully. Once ready, check the box to confirm your agreement.
Accepting the terms ensures that you are aware of the rules governing the use of the platform and helps protect both your business and Edge.
After submitting your registration, you’ll receive an activation email. Here’s what to do next:
* **Check Your Inbox:**\
Look for an email from Edge with an activation link. If it doesn’t arrive within a few minutes, check your spam or junk folder.
* **Click the Activation Link:**\
Clicking this link will verify your email address and activate your Edge account.
With your account activated, it’s time to secure it with a strong password:
* **Create Your Password:**\
Follow the guidelines provided to create a secure password. Make sure it’s something memorable yet strong.
Once you’ve set your password, you can log in to the Edge dashboard and start exploring the platform’s features.
***
## Important Considerations
Double-check all information during registration. Accurate details ensure a smooth onboarding process and reduce the likelihood of issues down the line.
Use a strong password and avoid sharing your login credentials. Security is paramount, and protecting your account starts with you.
The activation email is crucial for accessing your account. If you don’t see it, check your spam folder or request a new one.
***
## Key Terms to Know
* **API Key:**\
A unique identifier that allows you to authenticate and interact with Edge’s APIs. You’ll generate this key from your Edge Dashboard after logging in.
* **Edge Dashboard:**\
Your central hub for managing your Edge account, viewing analytics, and configuring API settings.
* **Activation Link:**\
A link sent to your registered email address to verify your account and activate your access to Edge.
***
That's it! You're now ready to start building with Edge. Welcome aboard—let's get to work!